Intro
I recently added a Synology NAS to my home lab and I am an instant fan. I have been spending time configuring and tinkering with the new device.
I use Pushover for sending push notifications from various home lab services to my devices. For example, I have it integrated in Home Assistant for reminders and notifications about unique automations.
When configuring notifications on the NAS, I noticed a “Push Service” tab and thought, “Great! I’ll set up Pushover.” But, to my surprise, it did not support the option and simply mentioned sending via Synology’s email server. I did some quick searches but all the solutions revolved around configuring a local web server or script on the NAS to translate and build the request. I explored the other sections and found that you can add an SMS provider and build an HTTP request. This should be sufficient to use Pushover and/or Slack.
It is worth mentioning that this is a work-around, but the logic is solid. Another option is to set up the Pushover notifications from e-mails, but personally I have a bunch of Applications set up and prefer each to have its own bucket and associated icon.
Configuration
This section is split into two parts, configuration of Pushover and configuration of the Synology.
Pushover
If you have never used Pushover, it is a $4.99 once per-platform cost. I do think it is well worth the price based on how many applications I have set up over the years.
- After setting up and logging into your account click Create an Application/API Token, which is next to Your Applications at the bottom of the page.
- Choose a unique name for the app, upload an icon (recommended), agree to the terms of service and then click Create Application.
- If the application is created successfully, you will be provided with an API Token/Key.
- As a final step for Pushover, go back to the main page find Your User Key.
You will need the API Token/Key and Your User Key to configure the Synology notifications, so either copy them both into a text editor or simply take note of where they are.
Synology
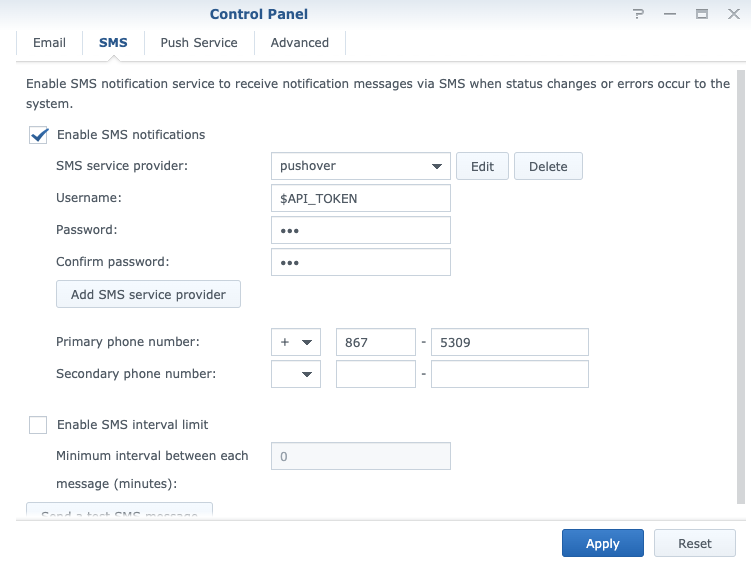
- Navigate to Control Panel -> Notification -> SMS
- Check the box to Enable SMS Notifications, and select Add SMS service provider
- Enter “pushover” as the Provider Name,
https://api.pushover.net/1/messages.jsonas the SMS URL, select POST as the HTTP Method, and click Next. - Leave the Edit HTTP request header section blank and click Next.
- Add the following Parameter:Values to Edit HTTP Response Body (yes all the values are blank except message) and click Next
| Parameter | Value |
|---|---|
| user | |
| token | |
| phone | |
| message | hello world |
- Match the following categories to the parameters, then click Apply.
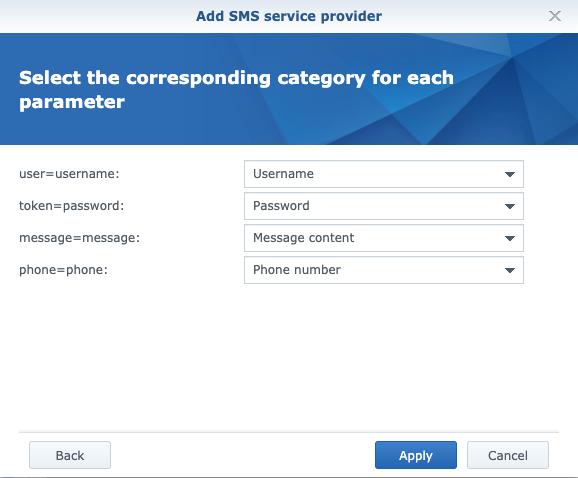
- Make sure the “pushover” provider you created is selected as the SMS service provider, then fill in the values from Pushover in the SMS notification section. Your User Key will be the Username:, the API Token/Key from the application page will be the Password:, and then enter a Primary phone number: (this is not used, but is required - so any phone number works).
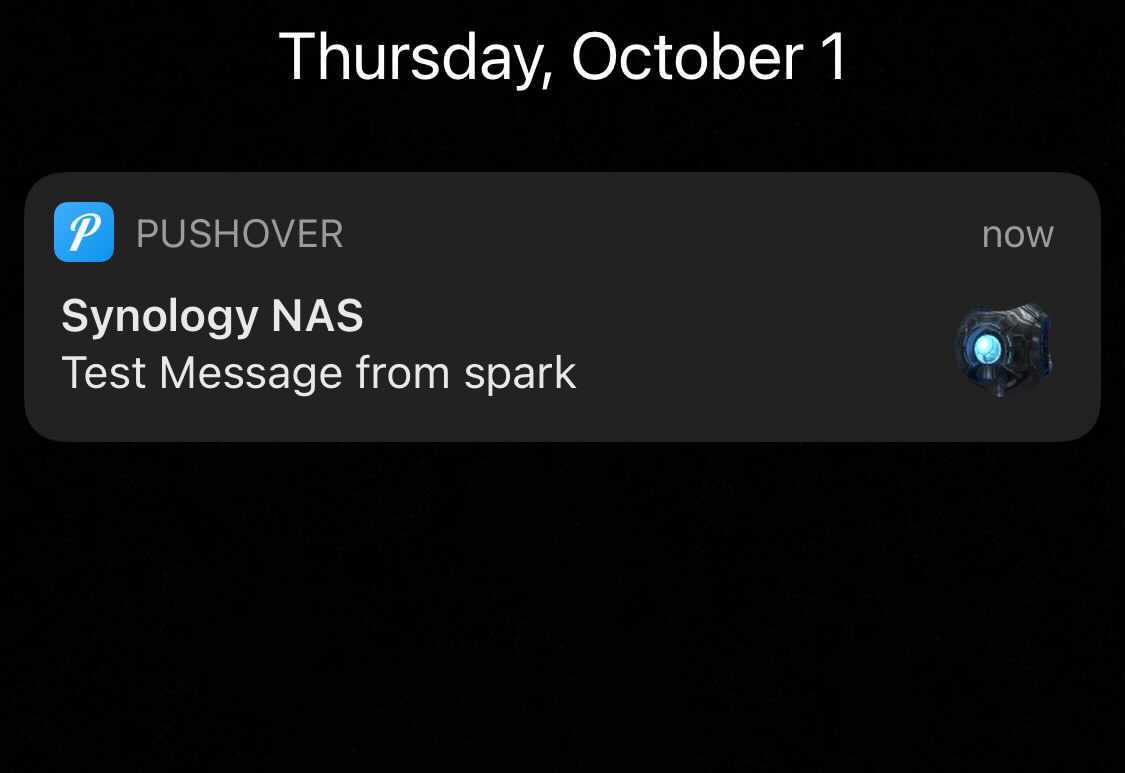
- Click Apply, and then click Send a test SMS Message. If everything is set up correctly you should receive a push notification from Pushover on your registered device:
Conclusion
I find it much easier to see a quick message pop up on my phone summarizing something happening in my home lab than checking e-mail constantly. Additionally, I have a UPS attached to my Synology via USB, so it is helpful to get Pushover notifications instead of missing the e-mail alerting me to a power anomaly and that my shutdown procedures are starting.
I hope this guide was clear and helps others!